3.4 - Timeline
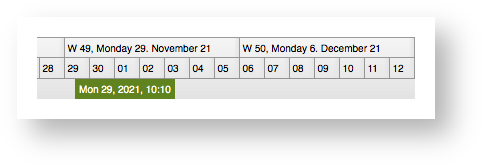
The timeline describes the time-managing functionalities handled by the Dateline and the Eventline. It is usually displayed above the Graphics element and its API provides additional methods like scrolling and zooming, both of which can be done with or without animation.
You can access the related API by using this.gantt.getTimeline().
An implementation for the timeline usually use the <schedule-date-line> and <schedule-event-line> ScheduleJS Angular Components in a Template file like in the following Angular Template:
<div class="time-line-container">

  <div class="timeline-info-column-filler"></div>

  <div class="time-line">

    <schedule-date-line [gantt]="gantt"></schedule-date-line>

    <schedule-event-line [gantt]="gantt"></schedule-event-line>

  </div>

</div>
The <div class="timeline-info-column-filler"></div> is used to fill the left-most part in case and is provided the info column witdth using the ScheduleJS specific CSS variable: var(--info-column-width).
.time-line-container {
  display: flex;
  flex-direction: row;

  .time-line-info-column-filler {
    width: var(--info-column-width); // Inherits the info column width.
  }

  .time-line {
    flex: 1;
    display: flex;
    flex-direction: column;
  }

}
Navigation
The timeline is used to navigate through time. It provides methods to jump to the current time or a given time. It can be requested to show a specific time unit ("show days"), or a time range.
| Method | Description |
|---|---|
timeline.showNow(center?: boolean) | Changes the start time of the timeline model in such a way that the current time (as already stored in the TimelineModel) will be displayed either on the left edge of the dateline or right in the middle. |
timeline.showTime(time: number, center?: boolean) | Changes the start time of the timeline model in such a way that the given time will be displayed either on the left edge of the dateline or right in the middle. |
timeline.showRange(startTime: number, endTime: number, animated?: boolean) | Changes the start time and the "millis per pixel" value of the timeline model in such a way that the given time range will become fully visible in the dateline. |
timeline.showTemporalUnit(unit: ChronoUnit, width: number) | Changes the start time and the "millis per pixel" value of the timeline model in such a way that the given time unit will be used in the dateline. Each cell in the dateline will be as wide as the given width. |
It should be noted that the timeline in cooperation with the dateline can only make a best-effort attempt at fulfillng these requests as they depend on the availability of dateline resolutions in the dateline model.
The methods above can be executed with or without animation. This animation can be controlled via the help of the following method: timeline.setMoveAnimated(boolean).
Zooming
The timeline is responsible for managing anything related to zooming. The user can select a time interval via a "lasso" by dragging the mouse and holding down the SHIFT key. The result will be a selected time interval which is stored in the read-only property selectedTimeInterval.
| Method | Description |
|---|---|
timeline.zoomIn() | Makes the timeline modify the timeline model in such a way that the resulting visible time range will be the current time range multiplied by / divided by the current zoom factor. |
timeline.zoom(factor: number, zoomMode?: ZoomMode, animated?: boolean) | Performs a zoom operation with the given zoom factor (either zoom in or out). The timeline will try to keep the given "frozen" time at its current location. This kind of behaviour is very useful for a pinch-based zoom, where the UI zooms "into" a specific time. |
Just like the moving operations the zoom operations can also be executed in an animated or non-animated way. To set an animated zoom, use timeline.setZoomAnimated(true).
Another method is used to fine-tune the zooming behaviour as some applications prefer to either keep the start time, the end time, or the center time while zooming. For this the application can use timeline.setZoomMode(enum). Possible values of this enum are KEEP_START_TIME, KEEP_END_TIME, or CENTER.
Scrolling
The timeline supports scrolling to the left and right in two different speeds.
| Method | Description |
|---|---|
timeline.scrollLeft() | Changes the start time property of the timeline model in such a way that the dateline will end up starting with an earlier time. |
timeline.scrollRight() | Changes the start time property of the timeline model in such a way that the dateline will end up starting with a later time. |
Visible Time Interval
The timeline is keeping track of the earliest and latest times shown by the timeline.
| Method | Description |
|---|---|
timeline.getVisibleStartTime(): number | Gets the earliest visible time in the timeline in seconds since unix Epoch. |
timeline.getVisibleEndTime(): number | Gets the latest visible time in the timeline in seconds since unix Epoch. |
timeline.getVisibleDuration(): number | Gets the duration of the visible time in the timeline in seconds since unixEpoch. |